Wednesday, June 27, 2012

Congratulations Grads!

If it's not football, then GRADUATION! That's what everyone's talking about..well at least among the people I see everyday.
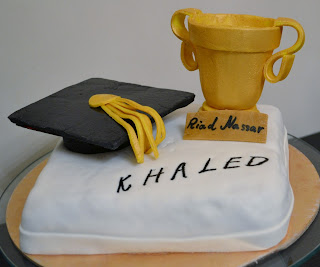

And soon enough, someone wanted a graduation-themed cake =D. But this cake also had another aspect to it: a trophy =D I directly thought: I can now use my new gold edible lustre dust! YAY! I've started using powder food coloring recently. At the start of my cake decorating "journey" I only knew about liquid food coloring, but now that I've gone deep into this world, I realized there are MANY!


Edible lustre dust is simply food coloring in the form of powder..with some "lustre" added to it. The lustre makes the fondant/icing shine and have an amazing finishing touch to it. You can use the powder as is, or you can mix it with a little alcohol or some lemon extract and "paint" on your fondant. Pretty cool, huh?!


Back to the cake: Chocolate as usual covered with elegant white marshmallow fondant.
I had some leftover black fondant so I crafted the graduation cap out of it. I had to place a small square cardboard beneath the top of the cap to keep it from falling apart.


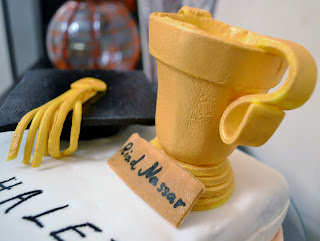
As for the trophy, that one was a challenge!! I (with my awesome mom's help), took out almost every cup/bowl/glass in the house that resembles the top of a trophy. After a frustrating hour, we decided on this old tea cup we had (you know that looks like those old coffee cups) and I draped some fondant over it and let it dry for a couple of days. After that I piled some different sized circles on top of each other for the base and made some S shaped handles :D

Finally (my favorite part) I painted the trophy gold!


Isn't the color just amazing?

Note to self: Get some more gold lustre dust and some silver ones as well!!


Oh and congratulations to all graduates =D

(Ehem, such as me and my sister Sally =D) YAY!


Pin It now!

Wednesday, June 20, 2012

Homer Simpson sure loves doughnuts!

This week has been FULL of events! I really can't remember the last time I've that much events (official ones) back to back! SO it's been CRAZY! but AWESOME!


Today is actually my dad's birthday (and mine was yesterday =D, just so you know!) and tomorrow's Father's Say so there was no way this week was going to pass without any Dee-licious cake!


After LOTS of thinking (and the fact that I know my dad looooves The Simpson's), I finally set my mind on this very cute doughnut shaped cake with Homer Simpson lying on top of it.


This is by far the "figurine" I'm most proud of. I loved making it. I looked up lots of picture of Homer and memorized every little detail and tried to to copy him as much as possible.


I think he turned out pretty good, right?!

View from the top

Anyway the inside of the doughnut/cake is fudgy super moist chocolate covered with white vanilla frosting and beige marshmallow fondant.


I then cut out the blue "frosting" and places it on top of the doughnut and covered it with sprinkles. Then came Homer with his Duff Beers =D

The Last Perfect Man!


What do you think?
Don't you just love the Simpsons?!!!

From D to all dads all over the world:


Happy Father's Day 


and Dad I love you! Happy Birthday =D

Me and my dad =D
Pin It now!

Monday, June 11, 2012

Liverpool & Chocolate

Football, football, FOOTBALL! Everyone's talking about football!

So  I had no chance of going through the summer without making some kind of football-related cake. And here it is:


The Liverpool Football Club Cake!


The cake is pretty simple! I covered it with red marshmallow fondant and covered the sides with some white fondant. The Liverpool logo was what needed most of the work. (I've never looked at any other logo that much :P) 


Well the liver bird was the most challenging part. Luckily I had (the amazing) edible coloring pens and used those for drawing on the bird. It turned out pretty well, don't you think?


The outline of the logo was pretty simple to make. Then I made some green fondant and made the banner on top and on the bottom and used a sugar pen to write on them =)

Oh and the inside of the cake is a delicious 2-layer chocolate fudge cake with the most decadent fudge frosting ever!


Oh and here's my other Football Cake: FC Barcelona Cake

Pin It now!

Thursday, June 7, 2012

Cake makes me Smile!

A midst all the tension and the work, you should always find a way to make you smile and ease the pain.

Everyone has his own way to loosen up and mine is: CAKE!

This cake was done for a good friend of the family's birthday. A big bright yellow smiley face with yummy Oreo cookies for eyes.


I covered the cake base with colored sprinkles to brighten it up with some more colors! A colorful cake, isn't it?

What do you think?

Doesn't it bring a smile to your face?


Pin It now!

Monday, May 21, 2012

Summer, Sun and Strawberries

I love this weather. Summer's almost here but there's still a light breeze in the air!


Also, I can eat my Strawberries!!!

Photo Credit: Diana Loutfy

Photo Credit: Diana Loutfy


And other than simply eating the awesome juicy sweet citrus-y  (yes, both :P) fruit all by itself, I did the next best thing:

A Strawberry Tart

Photo Credit: Diana Loutfy

I used the same pie crust recipe I always use. It took me some time to find the perfect one but I finally found it (and by some, I mean YEARS). Then I used the Cake Boss's Italian Custard Cream recipe (I wanted to try and use something other than my French Crème Pâtissière recipe). 


The pie crust is too good not to share so you'll find the recipe below.


Then I sliced up some strawberries with my new strawberry slicer =D and arranged them on top of the tart.


Photo Credit: Diana Loutfy


Photo Credit: Diana Loutfy


Then I used some my Aunt's strawberry jam to glaze the top.


Photo Credit: Diana Loutfy

Pie Crust

What You Need

  • 2 cups all-purpose flour
  • 3 tablespoons sugar
  • 1/4 teaspoon salt
  • 170 g unsalted butter, cold and cut into small pieces
  • 1 large egg, separated
  • 2 tablespoons ice water
What to Do

  1. Mix all the dry ingredients together in a bowl.
  2. Add the butter and mix using your hand or a pastry blender.
  3. Whip the egg yolk with the water.
  4. Make a well in the middle of the mixture and add the egg mixture.
  5. Mix the dough well until it holds together. If it's too sticky add some more flour, if it's too crumbly add some more water. (But be careful not too add too much as it will affect the texture of the crust)
  6. Wrap the dough and let it rest in the refrigerator for at least 30 minutes.
  7. Take out your dough, roll it out and place it in your pie pan. Place in refrigerator for 15 minutes.
  8. Using a fork, punch holes in the dough in order for it not to rise during baking.
  9. Place aluminum foil over your dough and place some beans over the foil (this will also help the pie not rise)
  10. Bake for 30 minutes in a preheated oven at 176 degrees Celcius.
  11. Take your crust out of the oven and using a brush, spread some whipped egg white over it.
  12. Return and bake for another 8 minutes, until it's golden in color.

Pin It now!

Wednesday, May 9, 2012

Back to Basics - Chocolate Chip Cookies

I was looking around Deezert and noticed that I had a very important thing missing! I have no idea how I could have forgotten such an important part of the dessert world!

Yes, you've guessed it:

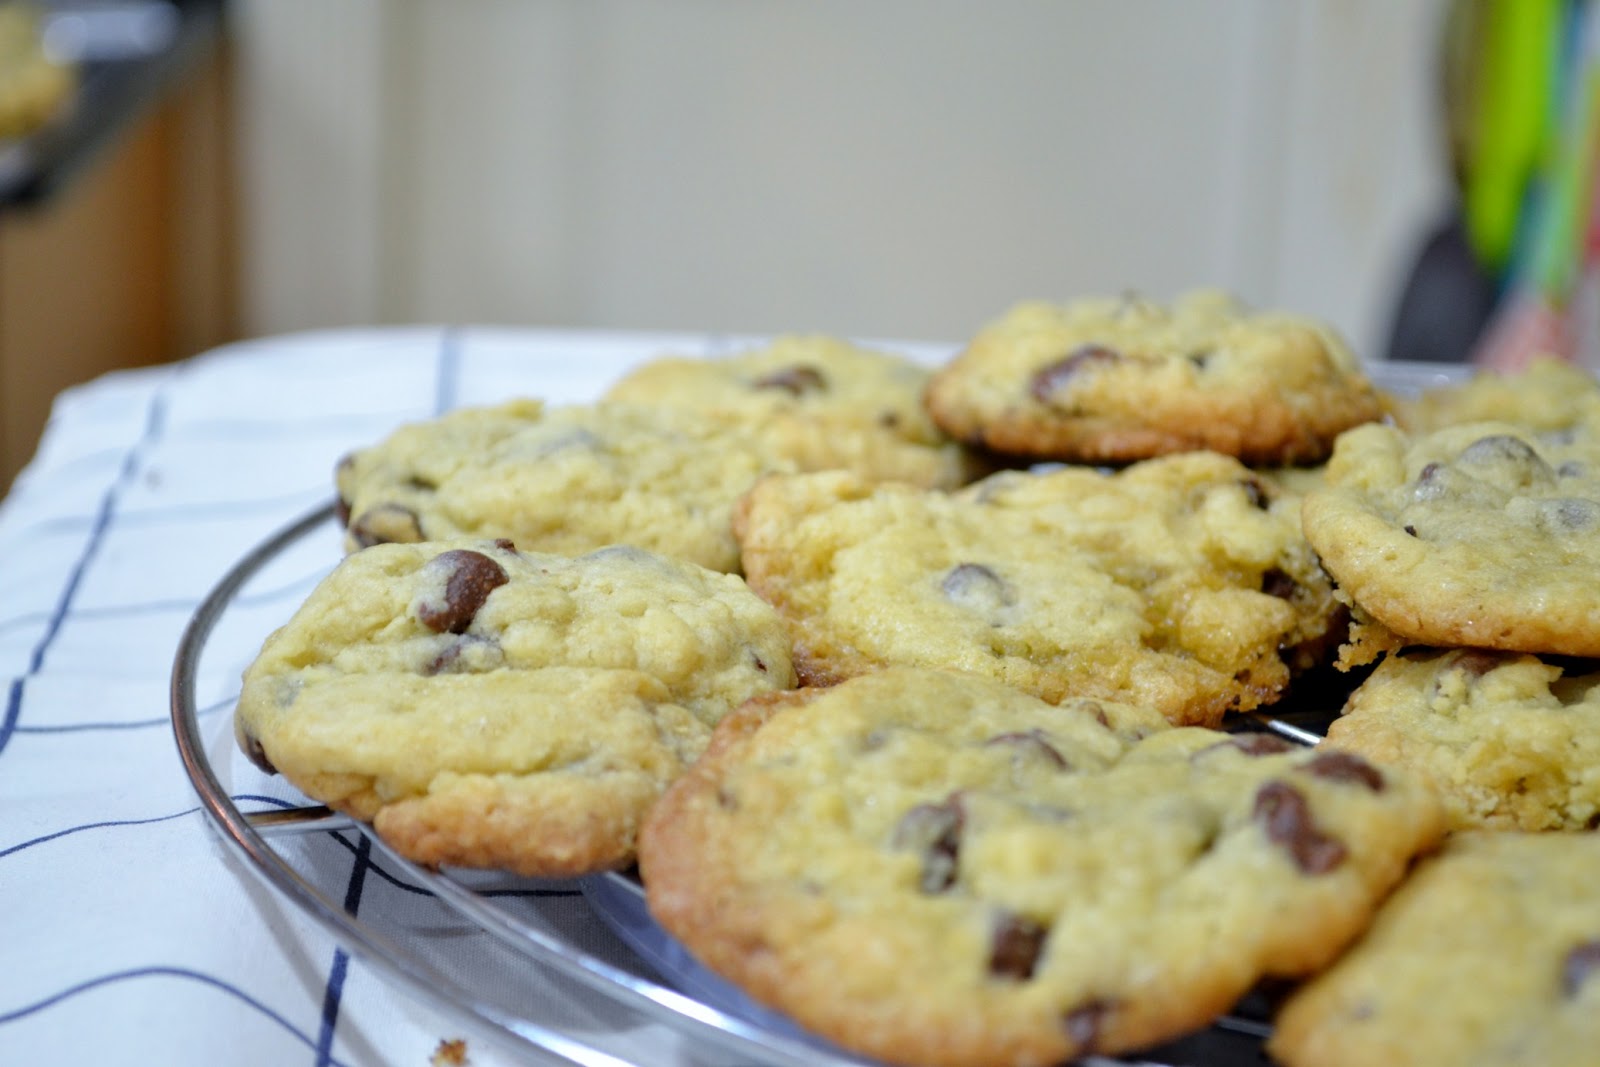
Chocolate Chip Cookies..my favorite kind of cookies!

Photo Credit: Deezert

Crunchy on the outside, goey and moist on the inside.

I found this amazing recipe on AllRecipes.com (my go-to site for recipes) and tweeked it a bit to suit my chocolate-y needs. You'll find the recipe at the end of this post. 

Photo Credit: Deezert
  
Photo Credit: Deezert

Photo Credit: Deezert
Cookies and a cup of milk!

What You Need:
  • 1 cup butter at room temperature  (around 225 g)
  • 3/4 cup white sugar
  • 1 1/4 cup brown sugar
  • 2 eggs
  • 2 tsp. vanilla extract
  • 3 cups all-purpose flour
  • 1 tsp. baking soda
  • 2 tsp. hot water
  • 1/2 tsp. salt
  • 2 cups semisweet chocolate chips

What to do:

  1. Cream together the butter and sugars till light and fluffy.
  2. Add the eggs - one at a time - and beat the mixture. Stir in the vanilla using a spatula.
  3. Dissolve the baking soda in the hot water and add to the mixture along with the salt.
  4. Sift and add the flour. Drop in the chocolate chips. Mix using a spatula. DO NOT over mix the dough. Work it just until the flour disappears.
  5. Cover the mixture and refrigerate it for at least an hour. (The longer you wait - if you can wait (I never can) - the yummier the cookies will turn out to be). The reason for this is that if you directly bake the cookies, the mixture will get soggy and directly start melting. It's better to let the dough rest and then bake the cookies.
  6. Scoop up 1 tablespoon of dough (I use an ice cream scoop) at a time and place them around 2 inches  apart on a baking sheet or an ungreased pan (the dough already contains lots of butter and should not stick). Recipe will make around 2 dozen cookies.
  7. Bake the cookies for around 10-12 minutes in a preheated oven (170 degrees Celsius), or just until the edges brown.
  8. Directly transfer them to a cooling rack in order to let them toughen up a bit (if they're crumbly, let them cook for a minute or so on the pan)
  9. After they've cooled down, DIG IN! (Don't forget to place the rest in an airtight container to keep them fresh - if there was any left!)

Pin It now!

Saturday, May 5, 2012

Twirls of Happiness

Twirls of Happiness Indeed!

I recently got this amazing cake decorating book that I was VERY impatient to try along with my new tools!

The book is called Contemporary Cake Decorating Bible by Lindy Smith!

This is my first post with all these new awesome decorating tools and I can't wait to try them all!

Anyway, it's a hot Saturday evening here in Beirut and I was very bored (and by very i mean VERY). So I thought I'd give the book a try. I baked some chocolate cupcakes (Recipe Below) in my new colorful cupcake cups and whipped up some swiss meringue buttercream.


Mixing Pink into the Buttercream =D

I also had some leftover white rolled fondant, so I got out my color pastes and tinted the white fondant with some colors.

I opened the book and started trying out the techniques, and here's what I (and my sister Lana) came up with:


Yellow Flower


Circles of Joy 


Lollipops and Cupcakes


Buttercream Roses


 Don't they look all cute and pinky?!


The mess after:


Pin It now!